Saturday, May 12, 2012

Happy Mother's Day!

Happy Mother's Day to all the moms out there! :) I had an inspiration to do this design earlier this week. I just thought of one of those cheesy "Mom" tattoos and thought it would make for a cute nail design. The blue on the other nails is China Glaze "For Audrey"...the most beautiful Tiffany blue. Hope you enjoy my "new ink". :P Probably the closest thing to a tattoo I will ever have! :P Happy Mommy's day! Threat your momma's with EXTRA love today...because you should treat them with love EVERYDAY!


Friday, May 4, 2012

May The Fourth Be With You!

Happy Star Wars Day!!!
Spent some time today working on a Star Wars manicure! Enjoy!


May The Fourth Be With YOU!
Lindsay

Sunday, April 29, 2012

Starry, Starry Nails

Hello there!
I have a new mani on this lovely Sunday evening! I was able to make a trip to my local Sephora this weekend to check out their new nail bar! (Super exciting! :P)  Along with their own Sephora by OPI line, they are now selling Julep, Nails Inc. London, Dior, NARS, Perfect Formula and Illamasqua. I've also heard that they will be carrying Ciate (the brand that Adele was wearing at the Grammy Awards) but my Sephora didn't have it yet.

I decided to pick up two Nails Inc. colors and I am wearing one in this manicure that I have for you today.  It is a beautiful cobalt blue called "Baker Street". I also added two accent nails using Icing "Written In The Stars". I am quite pleased with the end result. :) Just look...
 So pretty! See the little stars in Written In The Stars? So cute!
(in direct sun)

 Pretty bottle in the sun.
It just glows! :D

 I used one coat of Seche Clear for my base, Two coats of Baker Street and one coat of Seche Vite. 

Indoors, shade. Lovely. ;)

Hope you enjoyed my new mani! I definitely recommend Nails Inc as a brand. This was my first time trying it out and I loved the formula. Baker Street was opaque in two coats and pretty glossy before I even added Seche Vite. 

Smiles,
Lindsay

Friday, April 20, 2012

Neons and Neutrals

Neons and neutrals are currently my favorite color combination. It looks so fresh and it doesn't come off as obnoxious as neons sometimes can. This past weekend I did my sister's and my nails in two different neon and neutral color combos.

On my nails I have: OPI My Pointe Exactly (a BEAUTIFUL grey jelly from the NYC Ballet collection) and Julep Hayden (a neon peach)


 Two toned french manis are 10x better than regular a regular french...Just my opinion!


On my sisters nails (the bottom hand): Essie Jazz and China Glaze Flip Flop Fantasy (the perfect neon pink!)


Hope you enjoy our neon and neutrals! I would love to see what you come up with! :D

Saturday, April 7, 2012

I'm back with an abstract "Cloud" mani!

I bet you thought I died, didn't you?! Nope. Alive and well....just a busy girl! :)
I hope you all are doing well and enjoying Spring so far! :D
Today I have a mani that I did last week. It's sort of and abstract "cloud" mani. I used Orly "Wild Wisteria", "Essie Braziliant" (which is also on my toes right now! I love it!) and Sinful Colors "Snow Me White". This was my first attempt at the "cloud" and I like it! It actually wasn't that hard...even though it was freehand. No tape involved here! I hope you like it and I will be better about updating on here more often. :)

Hope you all have a very Happy Easter!
Lindsay

Saturday, February 11, 2012

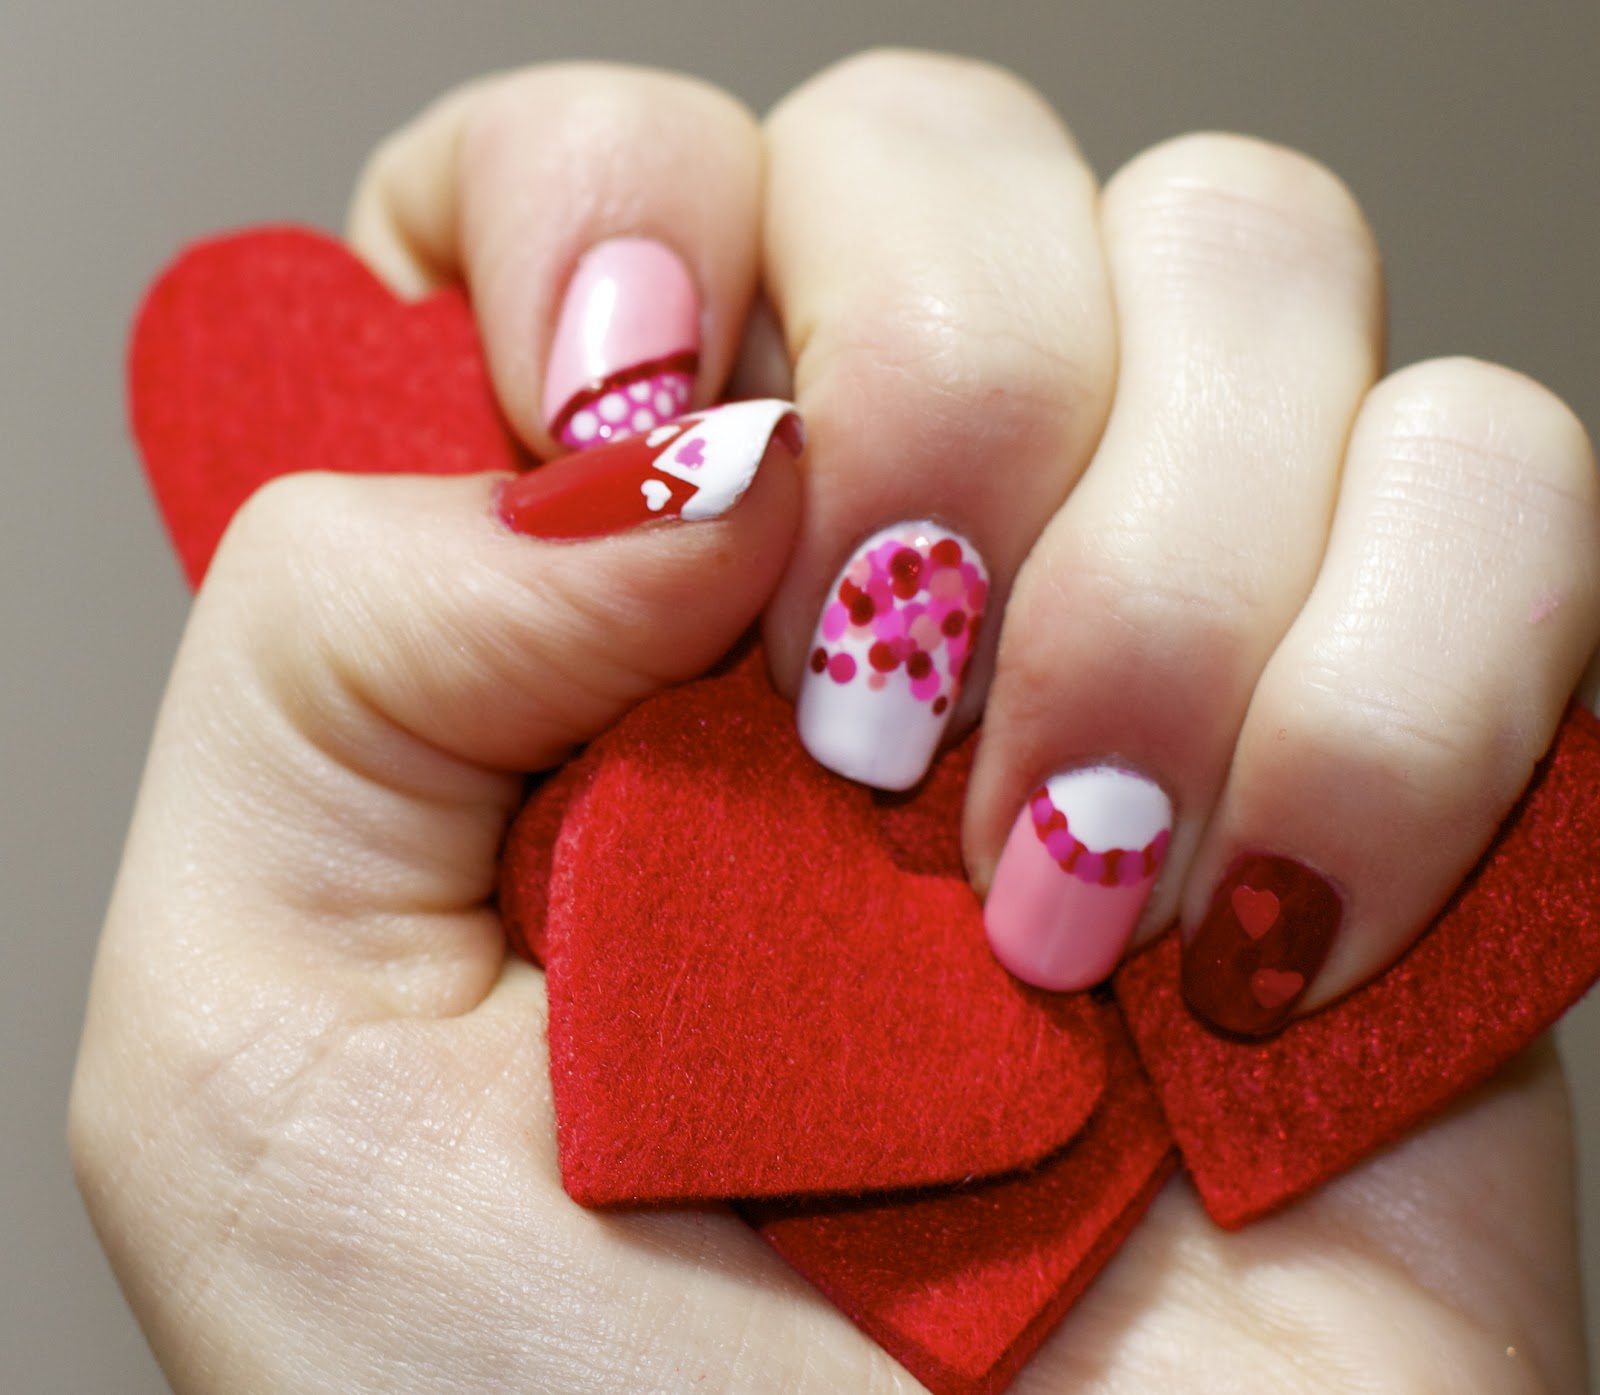
Valentine's Day Manicure

Hello, everyone! Just a post to show you my mani for Valentines day! :) I'm not much of a fan of the holiday but any excuse to do nail art is fine with me! :P
All nail art is by hand except for the two hearts on the pinky...those are glitter.
Hope you enjoy it!


Happy Valentine's Day, Lovelies!
<3, Lindsay

Wednesday, February 1, 2012

Shellac removal!

Just as promised, I am doing a post on how to remove shellac nails!
If you happened to read my previous post about shellac nails you'll know that I discovered (from some online research) a way to remove the shellac without scraping, damaging or weakening my nails. Yay! 

I knew that I was going to need to use pure acetone in the removal process but I was terrified of how the acetone would damage my already dry cuticles and skin. A lot of sources say to soak your fingers in a small bowl of acetone.... No thanks. My cuticles are shriveling up at just the thought of that.

So a found a recipe on Loodie's blog (great nail care advice!) for a moisturizing nail polish remover. Sounds too good to be true? I thought the same thing but I decided to give it a try. The recipe calls for Pure Acetone so I figured it would at least remove the shellac and just MAYBE it won't kill my hands. (It also has Glycerin in it which is a skin protectant.) It's also supposed to be a dupe for Zoya Remove +. I've never tried Remove + but I've heard good things about it.

Well, it WORKS! My nails actually felt moisturized when I was done removing the shellac. I was amazed. So enough chattering...here's how you make it!

Ingredients:
1 Cup of PURE Acetone - I bought mine at Sally's (use a glass measuring cup for this! I ruined a plastic one...)

1-2 tablespoons of liquid Glycerin (I used 1 1/2 tablespoons.) - I found mine at Walmart in the pharmacy section for less than $3. It wasn't easy to find...I had to ask for help.

Add a little bit of water - Water allows the ingredients to mix together. Without the water, Acetone and Glycerin are not miscible.  The amount of water depends on how much glycerin you put in. Only add enough so that the glycerin and acetone mix and you don't see the glycerin sitting at the bottom. Adding too much water will make the acetone less effective and will not remove the shellac.

PLEASE USE CAUTION WHEN MIXING!
You do not want to get any acetone in your eyes...ouch! Also, don't get the acetone on clothes or furniture and keep away from children.

Now for the process of removing...
 Cute, Right?! haha 
Seriously though, this is how I did it. :P
Soak a cotton ball in the acetone/glycerin concoction and place on your fingernail. Wrap the whole tip of your finger (make sure the cotton ball is covered) in aluminum foil and let soak for about 15 minutes. The aluminum foil keeps the cotton ball from drying out! 
After 15 minutes remove the foil and cotton ball and this is what should be happening....
 The shellac should be separating itself from the nail. 
So pretty.... :P
Now just take your cotton ball and try to wipe away the peeling shellac. If there are any stubborn pieces, re-soak the cotton ball and try the aluminum foil trick again. You may be able to use an orange stick to gently push the shellac off. 

I hope this helps! I have decided that this is going to be the remover I use on a regular basis...not just for shellac! I think this recipe combined with the foil method will also be great for removing stubborn glitter polish too!

Hope it works as well for you as it did for me!
Happy removing!

Lindsay