Sunday, April 29, 2012

Starry, Starry Nails

Hello there!
I have a new mani on this lovely Sunday evening! I was able to make a trip to my local Sephora this weekend to check out their new nail bar! (Super exciting! :P)  Along with their own Sephora by OPI line, they are now selling Julep, Nails Inc. London, Dior, NARS, Perfect Formula and Illamasqua. I've also heard that they will be carrying Ciate (the brand that Adele was wearing at the Grammy Awards) but my Sephora didn't have it yet.

I decided to pick up two Nails Inc. colors and I am wearing one in this manicure that I have for you today.  It is a beautiful cobalt blue called "Baker Street". I also added two accent nails using Icing "Written In The Stars". I am quite pleased with the end result. :) Just look...
 So pretty! See the little stars in Written In The Stars? So cute!
(in direct sun)

 Pretty bottle in the sun.
It just glows! :D

 I used one coat of Seche Clear for my base, Two coats of Baker Street and one coat of Seche Vite. 

Indoors, shade. Lovely. ;)

Hope you enjoyed my new mani! I definitely recommend Nails Inc as a brand. This was my first time trying it out and I loved the formula. Baker Street was opaque in two coats and pretty glossy before I even added Seche Vite. 

Smiles,
Lindsay

Friday, April 20, 2012

Neons and Neutrals

Neons and neutrals are currently my favorite color combination. It looks so fresh and it doesn't come off as obnoxious as neons sometimes can. This past weekend I did my sister's and my nails in two different neon and neutral color combos.

On my nails I have: OPI My Pointe Exactly (a BEAUTIFUL grey jelly from the NYC Ballet collection) and Julep Hayden (a neon peach)


 Two toned french manis are 10x better than regular a regular french...Just my opinion!


On my sisters nails (the bottom hand): Essie Jazz and China Glaze Flip Flop Fantasy (the perfect neon pink!)


Hope you enjoy our neon and neutrals! I would love to see what you come up with! :D

Saturday, April 7, 2012

I'm back with an abstract "Cloud" mani!

I bet you thought I died, didn't you?! Nope. Alive and well....just a busy girl! :)
I hope you all are doing well and enjoying Spring so far! :D
Today I have a mani that I did last week. It's sort of and abstract "cloud" mani. I used Orly "Wild Wisteria", "Essie Braziliant" (which is also on my toes right now! I love it!) and Sinful Colors "Snow Me White". This was my first attempt at the "cloud" and I like it! It actually wasn't that hard...even though it was freehand. No tape involved here! I hope you like it and I will be better about updating on here more often. :)

Hope you all have a very Happy Easter!
Lindsay

Saturday, February 11, 2012

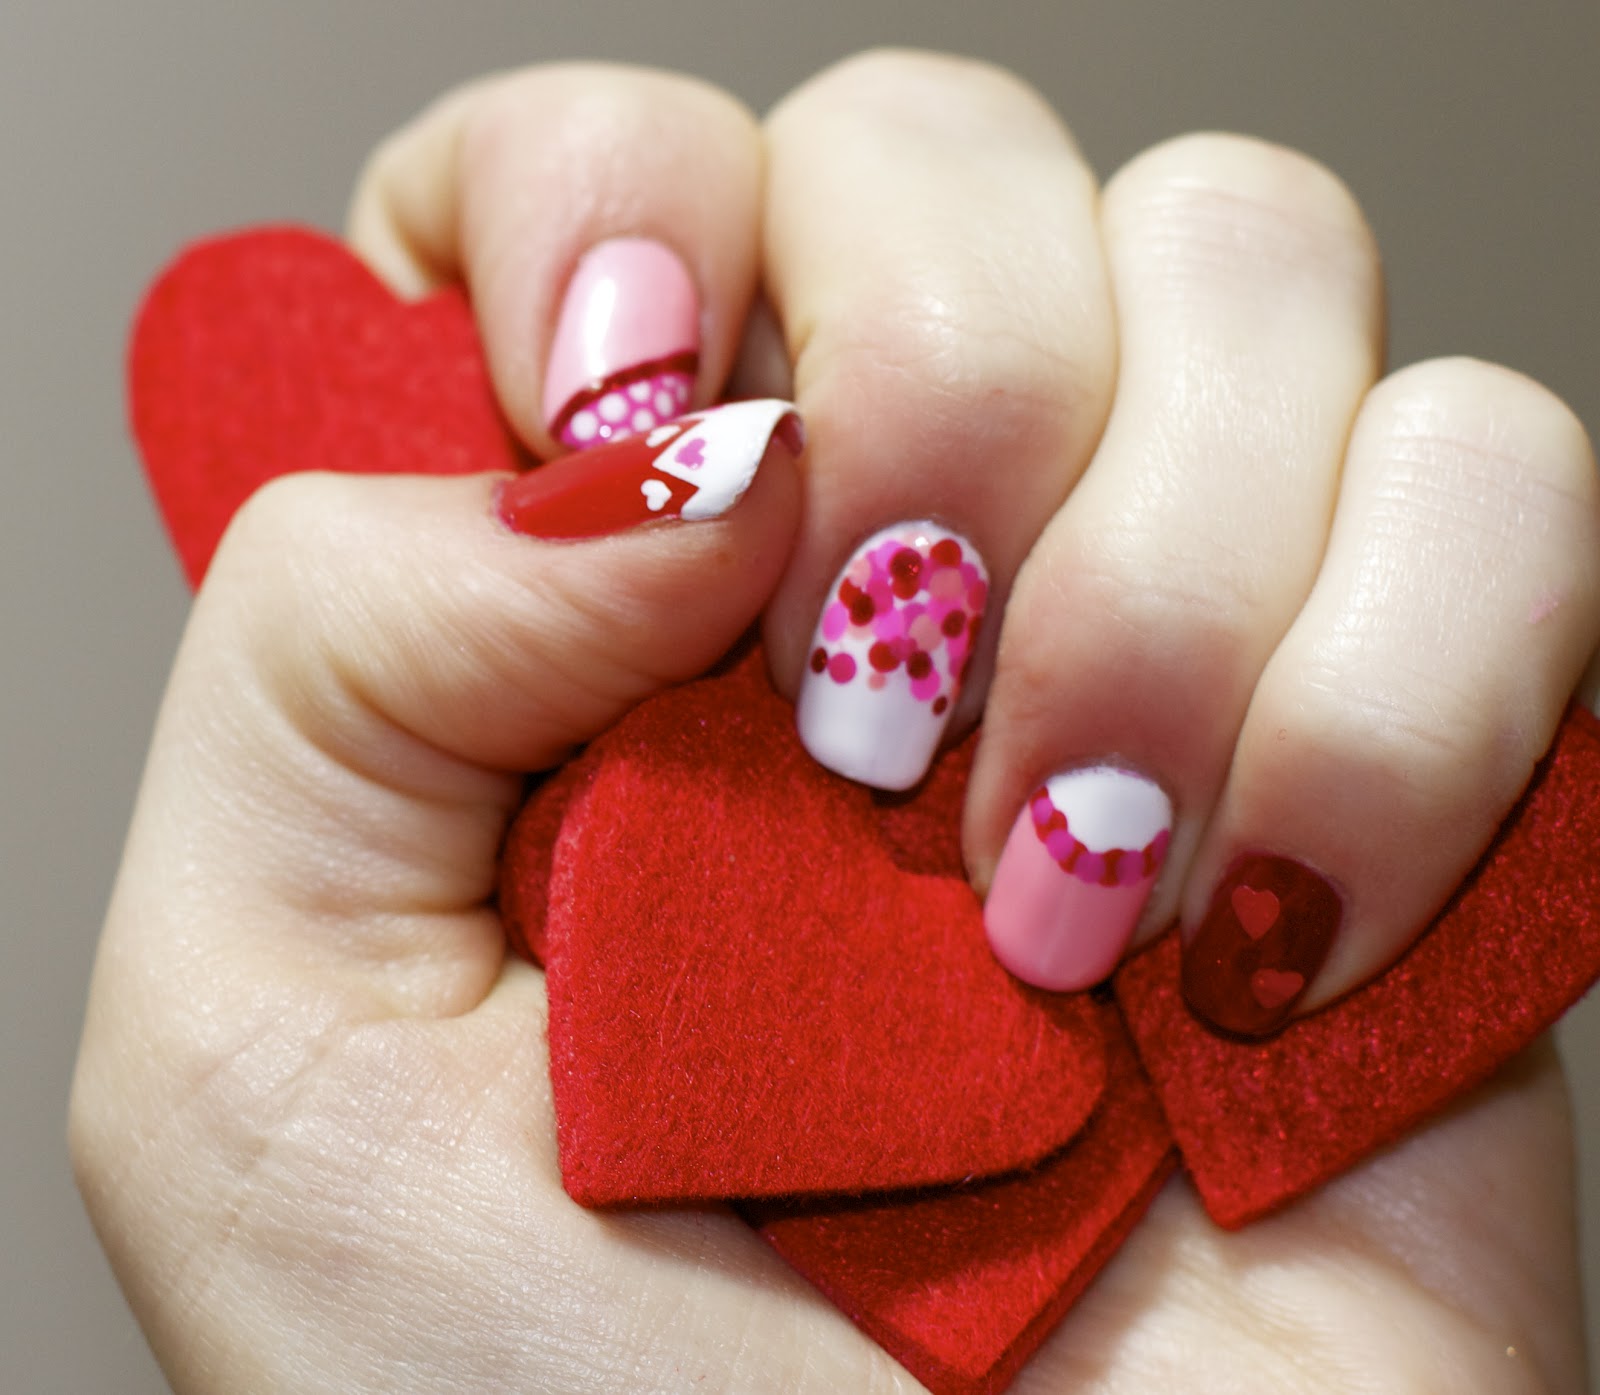
Valentine's Day Manicure

Hello, everyone! Just a post to show you my mani for Valentines day! :) I'm not much of a fan of the holiday but any excuse to do nail art is fine with me! :P
All nail art is by hand except for the two hearts on the pinky...those are glitter.
Hope you enjoy it!


Happy Valentine's Day, Lovelies!
<3, Lindsay

Wednesday, February 1, 2012

Shellac removal!

Just as promised, I am doing a post on how to remove shellac nails!
If you happened to read my previous post about shellac nails you'll know that I discovered (from some online research) a way to remove the shellac without scraping, damaging or weakening my nails. Yay! 

I knew that I was going to need to use pure acetone in the removal process but I was terrified of how the acetone would damage my already dry cuticles and skin. A lot of sources say to soak your fingers in a small bowl of acetone.... No thanks. My cuticles are shriveling up at just the thought of that.

So a found a recipe on Loodie's blog (great nail care advice!) for a moisturizing nail polish remover. Sounds too good to be true? I thought the same thing but I decided to give it a try. The recipe calls for Pure Acetone so I figured it would at least remove the shellac and just MAYBE it won't kill my hands. (It also has Glycerin in it which is a skin protectant.) It's also supposed to be a dupe for Zoya Remove +. I've never tried Remove + but I've heard good things about it.

Well, it WORKS! My nails actually felt moisturized when I was done removing the shellac. I was amazed. So enough chattering...here's how you make it!

Ingredients:
1 Cup of PURE Acetone - I bought mine at Sally's (use a glass measuring cup for this! I ruined a plastic one...)

1-2 tablespoons of liquid Glycerin (I used 1 1/2 tablespoons.) - I found mine at Walmart in the pharmacy section for less than $3. It wasn't easy to find...I had to ask for help.

Add a little bit of water - Water allows the ingredients to mix together. Without the water, Acetone and Glycerin are not miscible.  The amount of water depends on how much glycerin you put in. Only add enough so that the glycerin and acetone mix and you don't see the glycerin sitting at the bottom. Adding too much water will make the acetone less effective and will not remove the shellac.

PLEASE USE CAUTION WHEN MIXING!
You do not want to get any acetone in your eyes...ouch! Also, don't get the acetone on clothes or furniture and keep away from children.

Now for the process of removing...
 Cute, Right?! haha 
Seriously though, this is how I did it. :P
Soak a cotton ball in the acetone/glycerin concoction and place on your fingernail. Wrap the whole tip of your finger (make sure the cotton ball is covered) in aluminum foil and let soak for about 15 minutes. The aluminum foil keeps the cotton ball from drying out! 
After 15 minutes remove the foil and cotton ball and this is what should be happening....
 The shellac should be separating itself from the nail. 
So pretty.... :P
Now just take your cotton ball and try to wipe away the peeling shellac. If there are any stubborn pieces, re-soak the cotton ball and try the aluminum foil trick again. You may be able to use an orange stick to gently push the shellac off. 

I hope this helps! I have decided that this is going to be the remover I use on a regular basis...not just for shellac! I think this recipe combined with the foil method will also be great for removing stubborn glitter polish too!

Hope it works as well for you as it did for me!
Happy removing!

Lindsay

Sunday, January 29, 2012

From My Heart To Yours...

The title is corny, I know....but that's just how I roll. :P

So, I've decided to do an early Valentine's day mani because I think that v-day nails can be oh-so-adorable and hearts are appropriate all year long!
So for this mani I used a base coat of Seche Clear (my favorite base), Sally Hansen Hard As Nails "White On" (which I really need a new bottle of...it was yucky to work with cause it's so old), Pure Ice #603 Creme Siren and Seche Vite top coat. Thank goodness for Seche Vite...it made the white look presentable!

How did I do the half heart and dot design, you ask? By hand. I used a thin brush and made the outline of the heart shape and then just filled it in with the nail polish brush. The dots were made with the small side of my Orly dotting tool (I think it was $10?) from Ulta. If you don't have a dotting tool you could just use a toothpick!


Hope you enjoyed my heart manicure in time for valentine's day! Let me know if you decide to try it out or if you're doing a different design for Heart Day! ;) I would love to see pictures!

With love,
Lindsay


Tuesday, January 24, 2012

A shellac manicure and review!

So I had a week where I couldn't do my own nails....and I'm here to tell you I survived. :P
Haha the reason I didn't do my nails for a week is because one of my best friends got married this past weekend and I was in the wedding! It was a lovely winter wedding and we had a great time. Best wishes, Danielle and Scott! Anyway, as I was saying....I was a bridesmaid in the wedding and had to have a French manicure....for a whole week. Don't get me wrong, I love a good French manicure....just not when I have about 10 new bottles of brightly colored/glittered/duocrome lovely-ness waiting for me to use! (It was a GOOD birthday! :P haha)

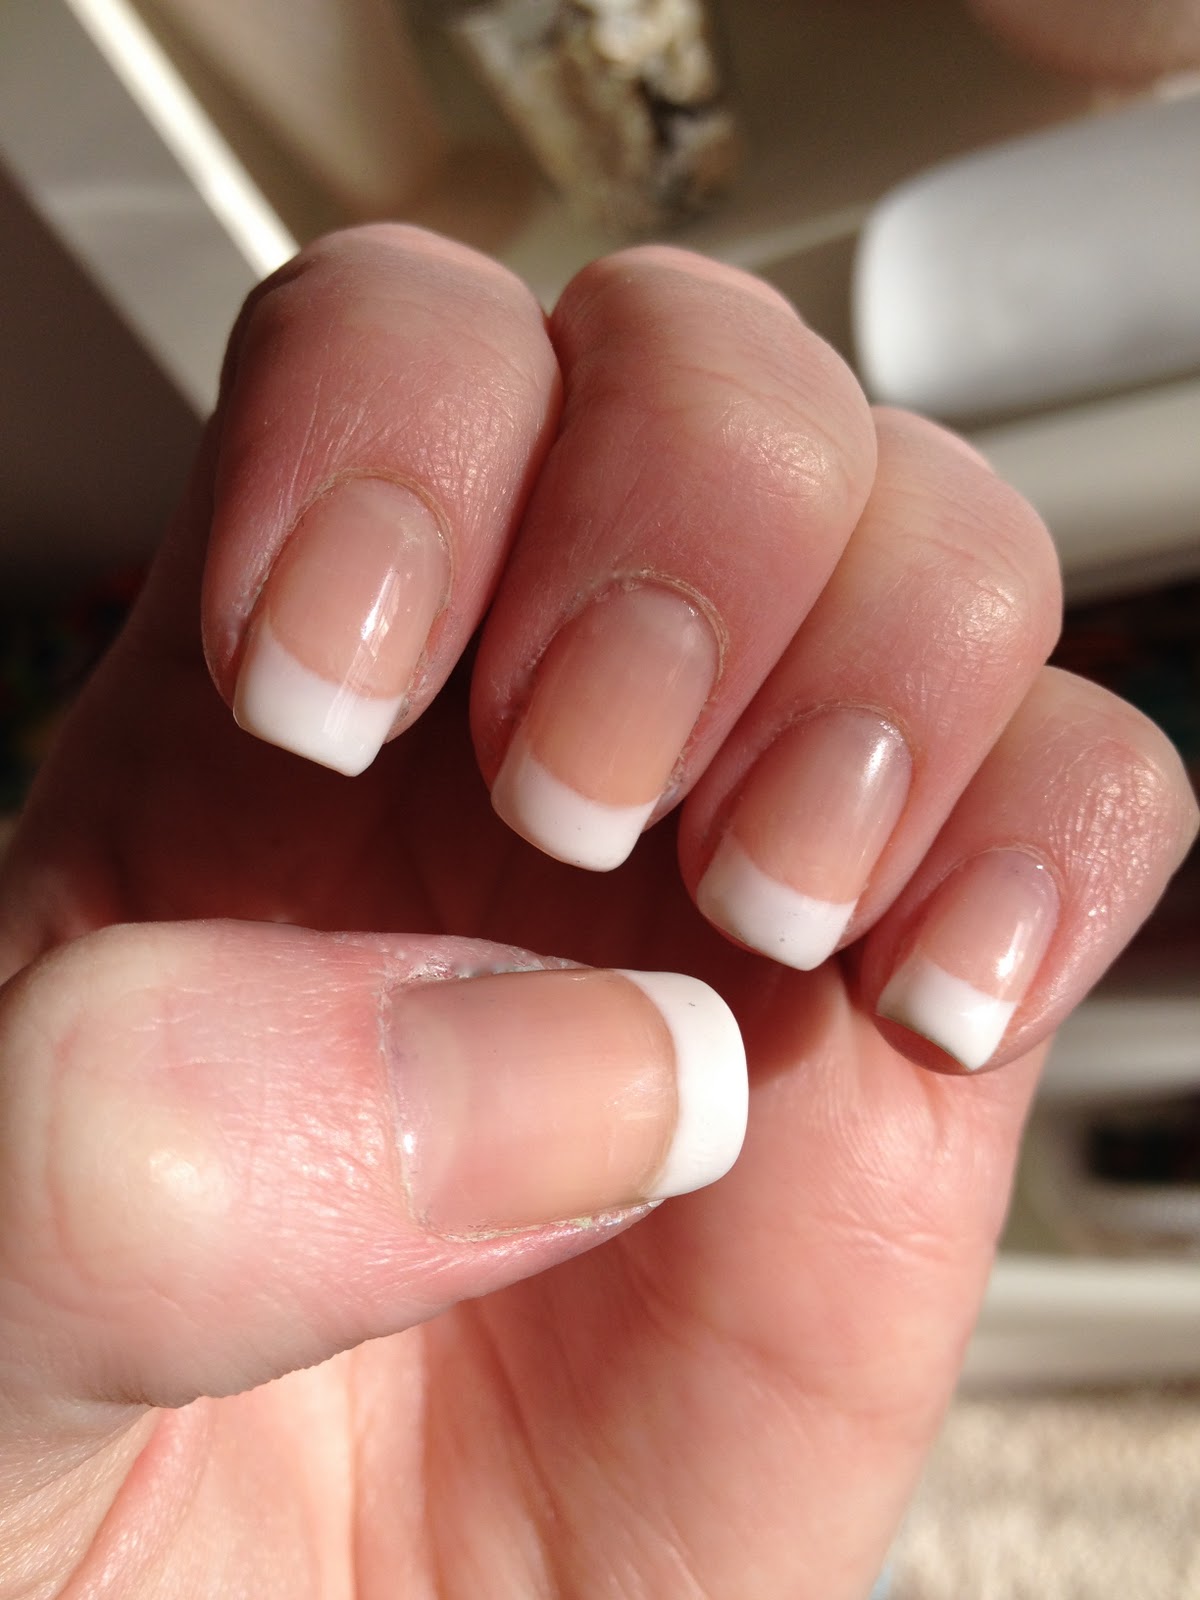
I should mention that this particular French manicure was a shellac manicure. This was my first experience with shellac. Danielle's (the bride) step-mother works as a nail technician in her family's nail shop and she and her sister were so generous to close the shop on a Sunday and have all the ladies in the bridal party come in for free shellac manis. SCORE! Haha

So instead of a mani by me this week, I will be doing a review on how I liked the shellac manicure. (ALSO, I have figured out how to safely remove the shellac at home by myself. Stay tuned for another blog post on DIY shellac removal process! The ladies at the nail shop told me it couldn't be done and I would have to go back in to have it taken off...HA! :P)

So if you know a little bit about shellac you probably know that it is advertised as a manicure that will last for two weeks and still look like new. As you probably already figured out, I had mine for exactly  one week. More on that in a bit. First I will show you some photos of my nails on the first day.

Pretty, right? Agreed. 

This is from the second day.
Excuse the cuticles. :/


This is day four...
Middle finger is really wearing at the cuticle.

And day five. You can really see it wearing by my cuticles. :/

See how it separating from the nail back by the cuticle? 
It was getting yucky under there and was kinda gross. 
I would have removed it on day four but they needed to last until the wedding!
(REALLY dry hands. Apologies. My skin doesn't like the winter. :/)

After day five things got really busy with the wedding and I didn't have a chance to take any more pictures of my nails...but it was getting bad. I wasn't very happy with the way it started to peel at the cuticle. I will say that the tip wear was very minimal, that was a plus, but I don't really have a job that involves typing or something that would typically wear that part of my mani. I did, however,  build a piece of Ikea furniture (My new Helmer for nail polish storage!!! I will blog about that another day!) with the shellac on and not a single nail chipped or broke...pretty good. Another plus is that I didn't experience yellowing of the white part of the French manicure like I usually do when I get/do a french manicure with just regular polish. (Am I the only one who has that problem?! It's gross.)

The shellac did seem to help strengthen my nails while it was on and I'm very happy to say that my nails do NOT feel weak/brittle after removing the shellac. That was something I was worried about.

Would I get a shellac manicure again? Maybe. I think it would be a perfect manicure for vacation when you don't really have the time or supplies with you to re-do or touch up your nails. Do you have a job that requires a lot of typing? (or do you work at Ikea as a funiture builder?! Haha) This may be a good solution for you. Do you have a job that requires a lot of hand washing? If so, I'm not sure this is a good solution. I say that because the 3 year old that I watch has been potty training and I've probably doubled the amount of times I wash my hands recently because we "try" on the potty about double the amount of times I was changing diapers....just in case! Haha I don't think that water and soap (and then moisturizer for my very dry hands!) was helping once the shellac started to peel at the cuticle.

Would I get a shellac manicure on a regular basis? No. I personally don't like to keep the same color on my nails for more than a week. That's just me. I get bored and want something new and exciting. (ADD? Maybe....don't judge me.) Also, I wasn't thrilled with how the shellac started to separate from my nail at the cuticle. It aggravated me. I think that the whole "two weeks looking like new" is a stretch. It did not look like new after one week...I wouldn't even allow it to get worse than that to see what it would have looked like after two weeks. Haha

So, if you're thinking about trying out shellac, go for it! Let me know in the comments how you like it. If you've already tried it let me know what you think about it in the comments.

Like I said...my next post will probably be on how I removed my shellac mani. And no, I didn't peel it off!
Stay tuned! :)

Lindsay